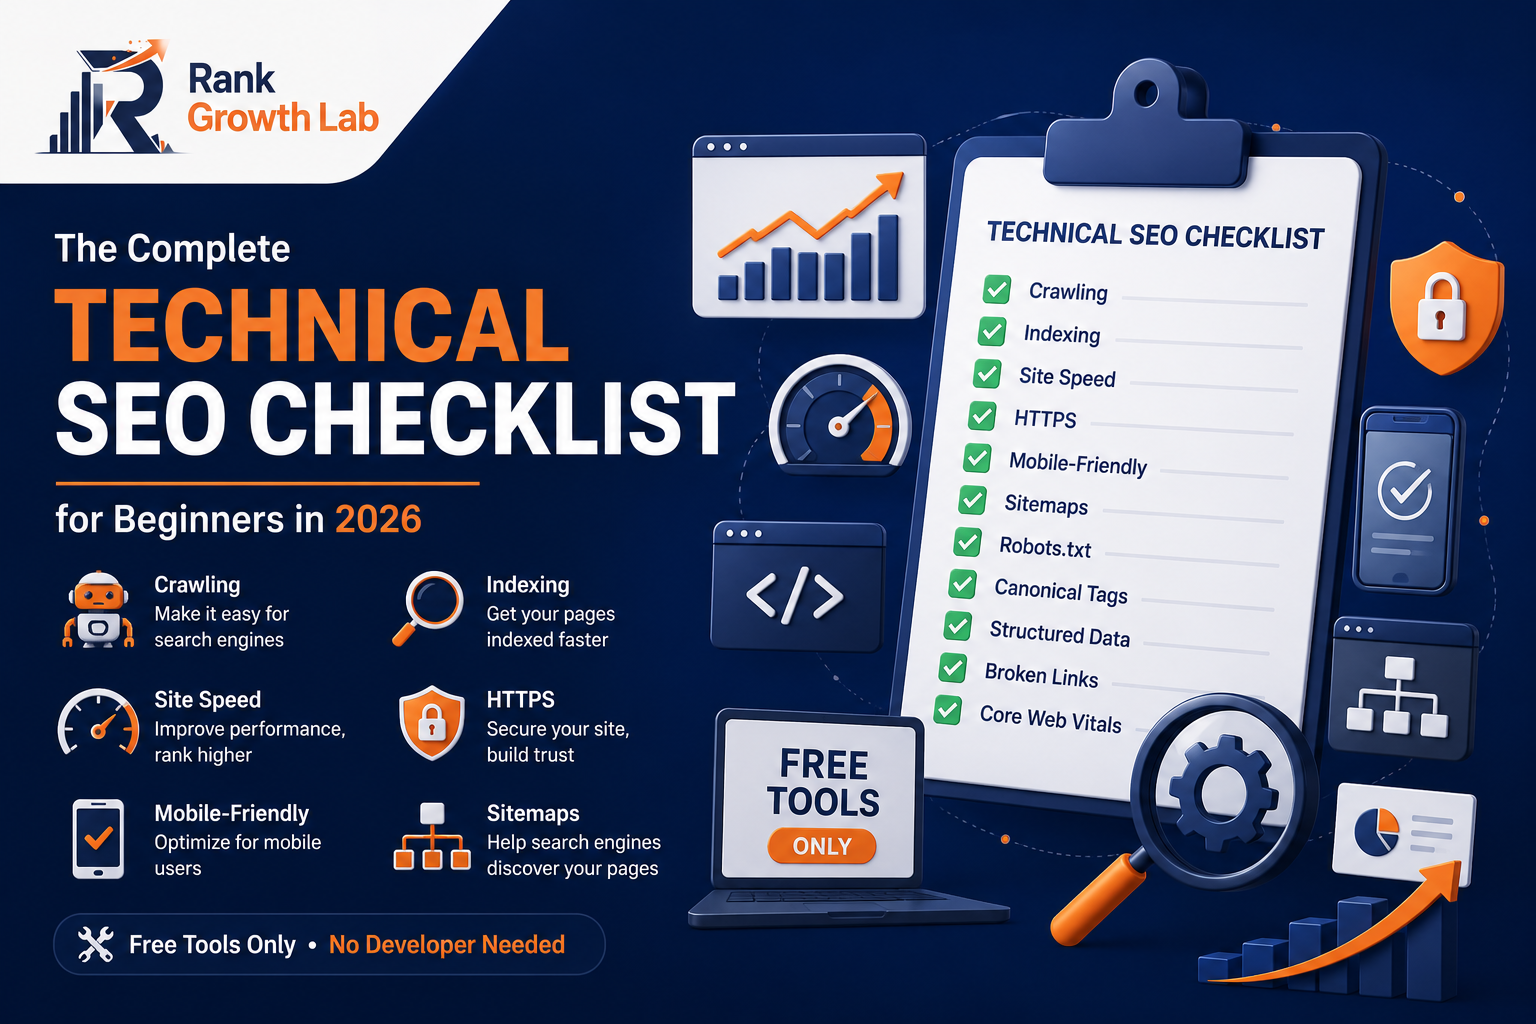
Technical SEO for Beginners: The Complete Checklist for 2026
You can write the best content in your niche and still rank nowhere if Google cannot properly crawl, render, and index your site. This checklist fixes the technical foundations — with free tools and no developer required.
R
Rank Growth LabMay 2026 · 15 min read
6Pillars covered
30+Checklist items
$0Cost required
15Min read
Technical SEO is the infrastructure layer that everything else depends on. Content quality, backlinks, and on-page optimisation all work better when your technical foundations are solid. Fix these issues once and they keep working for you indefinitely.
Most beginner SEO guides skip technical SEO because it sounds intimidating. It should not be. The majority of technical SEO issues on WordPress sites can be identified and fixed using free tools in a single afternoon — and the ranking improvements that follow are often the fastest results you will ever see from SEO work.
What Technical SEO Is and Why It Matters
Technical SEO refers to optimising the infrastructure of your website so search engines can crawl, render, and index your pages correctly. Unlike content SEO (what you write) or off-page SEO (who links to you), technical SEO focuses on how your website works behind the scenes.
Think of it this way: you could write the most comprehensive, expertly researched article on a topic — but if Google cannot access the page, cannot render its content, or flags it as insecure, that article will never rank. Technical SEO removes the barriers that stand between your content and its potential rankings.
The technical SEO reality check
A Google study found that crawl errors, indexing issues, and slow page speed are among the most common reasons new sites fail to rank — not content quality. In 2026 with AI-powered crawling, sites with clean technical structures are indexed faster, ranked more accurately, and cited more frequently in AI Overviews than technically flawed sites with equivalent content.
The 6 Pillars of Technical SEO
🕷️
Pillar 1 — Crawlability: Can Google Find and Access Your Pages?
5 checks
Before Google can rank your page, it must be able to crawl it — follow links to discover it and access its content. Crawlability problems silently prevent pages from ever entering Google’s index.
Submit your XML sitemap to Google Search Console
A sitemap is a file that lists every page on your site, helping Google discover all your content. With Rank Math installed, your sitemap is at yoursite.com/sitemap_index.xml. Go to Search Console → Sitemaps → submit this URL. Check that the status shows “Success” with no errors.
Free tool: Google Search Console
Check your robots.txt file is not blocking important pages
Your robots.txt file tells Google which pages to crawl and which to skip. A misconfigured robots.txt can accidentally block your entire site from Google. Go to yoursite.com/robots.txt and check it exists. It should allow Googlebot access to your content. Never add “Disallow: /” — this blocks everything.
Free tool: Google Search Console → robots.txt tester
Fix all 404 errors and broken internal links
A 404 error means a page that was once live no longer exists. Every 404 wastes Google’s crawl budget and loses any link equity that pointed to the missing page. Go to Search Console → Pages → Not found (404) to see all broken URLs. Set up 301 redirects from broken URLs to the most relevant live page using Rank Math’s Redirections feature.
Free tool: Google Search Console + Rank Math Redirections
Ensure no important pages have noindex tags
A noindex tag tells Google not to index a page. This is useful for thank-you pages and admin pages — but catastrophic if accidentally applied to blog posts or tools pages. Check Search Console → Pages → “Excluded by noindex tag” to see which pages are blocked. If any important pages appear here, remove the noindex tag in their Rank Math settings.
Free tool: Google Search Console → Indexing → Pages
Add internal links to all “Discovered — not indexed” pages
Pages showing as “Discovered — currently not indexed” in Search Console have been found by Google but not yet crawled. The most common reason is insufficient internal links pointing to them. Add 2-3 internal links from other published articles to each undiscovered page and request indexing using URL Inspection.
Free tool: Google Search Console + URL Inspection
🔒
Pillar 2 — HTTPS and Security: Build Trust With Google and Users
3 checks
HTTPS is a confirmed Google ranking factor. Sites without a valid SSL certificate rank lower, trigger browser security warnings, and lose user trust the moment they land on your page. This is non-negotiable in 2026.
Verify your site runs on HTTPS with a valid SSL certificate
Check your site URL starts with https:// and shows a padlock icon in browsers. If your site still runs on http://, contact your hosting provider — most modern hosts including Hostinger provide free SSL certificates via Let’s Encrypt that activate with one click from the control panel.
Free: Check in browser + Google Search Console → HTTPS report
Redirect all HTTP URLs to HTTPS versions
Even with SSL active, some internal links or old indexed URLs may still point to http:// versions. Set up a site-wide redirect forcing all http:// traffic to https://. On WordPress, Rank Math handles this automatically. You can also set it in your .htaccess file or through your host’s control panel.
Free: Rank Math → General Settings → Redirections
Set your preferred domain version in Search Console
Your site should resolve consistently to one URL version — either www.yoursite.com or yoursite.com, not both. Having both versions active without a redirect creates duplicate content. In Search Console, verify the exact URL version you want Google to use as your canonical domain.
Free: Google Search Console → Settings → Change of address
📱
Pillar 3 — Mobile-First: Google Ranks Your Mobile Version
4 checks
Google uses mobile-first indexing — meaning it crawls and indexes the mobile version of your site, not the desktop version. If your mobile experience is poor, your rankings suffer regardless of how good the desktop version looks.
Test your site on Google’s Mobile-Friendly Test
Go to search.google.com/test/mobile-friendly and enter your URL. Google will tell you whether your page passes mobile usability standards and flag any specific issues — text too small to read, clickable elements too close together, or content wider than the screen.
Free: search.google.com/test/mobile-friendly
Use a responsive WordPress theme
A responsive theme automatically adjusts your site’s layout for any screen size. GeneratePress and Astra — both free — are fully responsive and score 95+ on Google’s mobile usability tests out of the box. If your current theme is not responsive, switching is the fastest fix for all mobile issues.
Free: GeneratePress or Astra theme
Check Search Console for mobile usability errors
Go to Search Console → Experience → Mobile Usability. This report shows which specific pages have mobile issues and what those issues are. Fix the highest-traffic pages first — the impact is immediate since Google re-crawls fixed pages relatively quickly.
Free: Google Search Console → Experience → Mobile Usability
Ensure tap targets are large enough on mobile
Buttons and links must be large enough and spaced far enough apart for users to tap accurately on a touchscreen. Google recommends tap targets of at least 48×48 pixels with 8 pixels of space between them. Most responsive themes handle this automatically — check your site manually on a real mobile device to confirm.
Free: Manual check on mobile device
⚡
Pillar 4 — Page Speed: Core Web Vitals as a Ranking Factor
5 checks
Page speed affects rankings directly through Core Web Vitals and indirectly through bounce rate — users who leave immediately because a page loads slowly signal to Google that the page did not satisfy the search. Fast sites rank higher and convert better.
Run PageSpeed Insights on your most important pages
Go to pagespeed.web.dev and test your homepage, your most visited blog post, and your tool pages. PageSpeed Insights gives you a score out of 100 and specific recommendations for what to fix. Target scores above 90 for mobile and above 95 for desktop. Below 50 on mobile is a significant ranking liability.
Free: pagespeed.web.dev
Install a caching plugin to speed up page delivery
Caching stores pre-built versions of your pages so they load instantly instead of being rebuilt from the database on every visit. W3 Total Cache and LiteSpeed Cache are both free and reduce page load time by 40-60% on most WordPress sites. Install one — not both — and enable the basic settings.
Free: W3 Total Cache or LiteSpeed Cache plugin
Compress and convert all images to WebP format
Uncompressed images are the single most common cause of slow page load times. WebP format is 25-35% smaller than JPEG with identical visual quality. Install Smush or ShortPixel (both free) to automatically compress and convert images on upload. Run the bulk optimiser on your existing image library.
Free: Smush or ShortPixel WordPress plugin
Check and fix Core Web Vitals in Search Console
Go to Search Console → Experience → Core Web Vitals. Check both mobile and desktop reports. Pages showing as “Poor” need immediate attention — they are actively ranking lower because of speed issues. For the complete guide to what LCP, INP, and CLS mean and how to fix each one, see our Core Web Vitals guide.
Free: Google Search Console → Experience
Enable GZIP compression on your server
GZIP compression reduces the size of HTML, CSS, and JavaScript files sent from your server to the browser — typically by 70-80%. Most caching plugins enable this automatically. Verify it is active using the free tool at gzip.ee — enter your URL and confirm GZIP is enabled.
Free: gzip.ee to check + caching plugin to enable
🏗️
Pillar 5 — Site Architecture: Structure Google Can Navigate Easily
5 checks
Site architecture refers to how your pages are organised and linked to each other. A well-structured site helps Google understand the hierarchy of your content, distribute ranking authority efficiently, and crawl every page without wasting budget.
Keep all important pages within 3 clicks of the homepage
Pages buried deep in your site structure receive less crawl attention and pass less internal authority than pages close to the homepage. Every blog post should be reachable from the homepage in three clicks or fewer — typically: Homepage → Blog → Category → Article. Avoid creating deep nesting structures.
Free: Manual audit of your site navigation
Add breadcrumb navigation to all blog posts
Breadcrumbs are navigation links showing the hierarchy of a page: Home → Blog → SEO → This Article. They help users navigate and help Google understand your site structure. Rank Math adds breadcrumb schema automatically when you enable it in settings. Breadcrumbs also appear in search results, making your listing more visually prominent.
Free: Rank Math → Titles & Meta → Breadcrumbs
Fix duplicate content with canonical tags
Duplicate content occurs when the same content is accessible via multiple URLs — for example, yoursite.com/post and yoursite.com/post?ref=twitter showing identical content. Google may split ranking signals between the versions. Canonical tags tell Google which URL is the “official” version. Rank Math sets these automatically for WordPress content.
Free: Rank Math SEO plugin
Use clean, consistent URL structures
Set your WordPress permalink structure to /%postname%/ — this creates clean URLs like yoursite.com/article-name instead of yoursite.com/?p=123. Go to WordPress → Settings → Permalinks and select “Post name”. Never change this after your site has indexed pages — always set up redirects if you must update URLs.
Free: WordPress → Settings → Permalinks
Build a strong internal linking structure
Internal links distribute ranking authority across your site and help Google understand which pages are most important. Every new article should link to at least three other articles and have at least three other articles linking back to it. For the complete internal linking strategy, see our internal linking guide.
Free: Rank Math link suggestions + manual audit
🤖
Pillar 6 — Structured Data: Help Google and AI Understand Your Content
4 checks
Structured data markup tells search engines what your content means — not just what it says. In 2026 it also determines whether AI systems like Google AI Overviews and ChatGPT search cite your content in their answers.
Add Article schema to every blog post
Article schema tells Google the article’s title, author, publish date, and publisher. Rank Math adds this automatically when you set your post type to “Article” in the Schema tab of each post. Verify it is working using Google’s Rich Results Test at search.google.com/test/rich-results.
Free: Rank Math SEO plugin + Rich Results Test
Add FAQ schema to articles with question sections
FAQ schema adds expandable questions directly in Google search results — dramatically increasing the visual space your result occupies and your click-through rate. Every article with a FAQ section should have FAQ schema. Use Rank Math’s FAQ block in the WordPress editor for automatic schema generation. See our full schema markup guide for implementation details.
Free: Rank Math FAQ block
Add Organization schema to your homepage
Organization schema defines your brand entity — name, logo, social profiles, and contact information. This helps Google understand your brand as a distinct entity and builds the authority signals that influence E-E-A-T evaluation. Set this up once in Rank Math → Titles & Meta → Global Meta → Knowledge Graph.
Free: Rank Math → Knowledge Graph settings
Validate all schema using Google’s Rich Results Test
After adding any schema, always validate it at search.google.com/test/rich-results. This shows whether Google can detect and read your structured data correctly — and flags any errors preventing rich results from appearing. Fix all errors shown. Warnings are acceptable; errors must be resolved.
Free: search.google.com/test/rich-results
How to Audit Your Technical SEO Right Now
The fastest way to identify technical issues across your site is a combination of three free tools used together:
1
Run your site through the free SEO analyzer
Use the free SEO analyzer at RankGrowthLab to get an instant audit of any page. It checks title tags, meta descriptions, heading structure, image alt text, and page speed signals — giving you a prioritised list of issues to fix. No account required.
2
Check Search Console for indexing and Core Web Vitals issues
Go to Search Console → Indexing → Pages to see any crawling and indexing errors. Then go to Experience → Core Web Vitals to check page speed issues. These two reports cover the most common and highest-impact technical problems. Work through each error category systematically — fix the most common issue type first.
3
Test your most important pages on PageSpeed Insights
Test your homepage and your top 3 articles at pagespeed.web.dev. Note the specific recommendations in the “Opportunities” section — these are the changes that will have the greatest impact on your load time. Implement the highest-impact fixes first: usually image compression, caching, and render-blocking resources.
Technical SEO Priority Order
Not all technical issues are equally urgent. Here is the order to tackle them:
🔴 Fix Immediately
No HTTPS, pages blocked by robots.txt, site not indexed, 404 errors on key pages
🟡 Fix This Week
Failing Core Web Vitals, mobile usability errors, missing sitemap, slow page speed
Start today: Run your homepage through the free SEO analyzer and PageSpeed Insights. Note every issue flagged. Then open Search Console and check the Pages and Core Web Vitals reports. You now have a prioritised list of technical issues for your specific site.
This week: Fix every red issue — 404 errors, noindex problems, HTTPS issues. These are the blockers that prevent Google from properly indexing your site. Each fix is typically fifteen to thirty minutes and produces ranking improvements within two to four weeks as Google re-crawls the corrected pages.
This month: Work through the amber issues — Core Web Vitals, schema markup, image compression. These compound over time and become increasingly valuable as your content library grows.
Technical SEO is not glamorous. It does not feel creative. But fixing a single crawl error that was blocking three of your best articles from being indexed can produce more ranking improvement in a week than three months of new content. Do the unglamorous work first — it pays the highest dividends.
FAQ
Frequently Asked Questions
Common questions about technical SEO for beginners in 2026.
For WordPress sites, no — the vast majority of technical SEO issues can be fixed using free plugins and built-in tools without touching code. Rank Math handles schema markup, canonical tags, redirections, and sitemaps automatically. Caching plugins fix speed issues. Google Search Console identifies crawling and indexing problems. The only situations requiring developer help are custom theme modifications, server-level configuration changes on non-managed hosting, or complex JavaScript rendering issues on headless sites.
For a growing blog, run a basic audit monthly and a comprehensive audit every three months. The monthly check should cover Search Console for new indexing errors, Core Web Vitals changes, and any new 404 errors. The quarterly comprehensive audit should work through every item in the checklist above. New technical issues can appear whenever you publish content, change themes, install plugins, or your hosting environment changes — so regular monitoring catches problems before they compound.
Technical SEO focuses on how your website works — crawlability, indexing, speed, security, and site structure. On-page SEO focuses on what appears on each individual page — title tags, content quality, headings, and internal links. Technical SEO creates the foundation that allows on-page SEO to work effectively. A page with perfect on-page optimisation but technical crawling errors will never rank. Fix technical issues first, then optimise each page’s on-page factors. See our complete on-page SEO guide for the full breakdown.
Technical fixes typically produce faster ranking improvements than content changes because they remove blockers rather than creating new signals. Fixing a crawling error that was preventing pages from being indexed can produce ranking improvements within 1-2 weeks once Google re-crawls the corrected pages. Core Web Vitals improvements typically show ranking impact within 2-4 weeks. Schema markup additions can produce rich result appearances within days once Google processes the updated schema. Use URL Inspection to request immediate re-crawling after every technical fix.
Yes — arguably more important for small blogs than large ones. A large site with thousands of pages can absorb some technical issues without catastrophic ranking impact. A small blog with fifteen articles where three are not indexed due to technical errors has effectively lost 20% of its content from Google’s perspective. Getting the technical foundations right from the start means every article you publish can be crawled, indexed, and ranked immediately — rather than discovering months later that your best content was blocked the whole time.
R
Rank Growth Lab
Rank Growth Lab publishes free SEO tools and practical guides for bloggers and indie founders. Every technical SEO item in this checklist is implemented and actively maintained on rankgrowthlab.com.